Reviews
RideSaver Rim Insert Technology
Over the past couple of years, a number of niche products have entered the mountain bike market that modify the bike to ground interface beyond the simple rim/tire combination. These technologies are generally inserted into the tire airspace of tubeless rim/tire setups with reported claims including reduced tire burping, square edge hit protection, more tunable airspace, better grip with lower air pressure and so on.
Products on the market are all a variant of the same central premise, inclusion of an insert that interfaces with both the tire and rim. These include CushCore, Schwalbe ProCore and HuckNorris systems. Reviews of these systems have generally been favourable, and anecdotally I’ve seen many EWS racers utilizing these systems in the harsh conditions of their racing environment. Pricing on these systems ranges from $90 Cdn for HuckNorris to $250 Cdn for ProCore. Installation ranges from stuffing them in and seating the tire, which may be more difficult with the inclusion of the insert, to modification of the rim with an additional hole for a second valve.
So let’s then agree and affirm the claims of these systems. They do allow the rider to lower air pressure while simultaneously providing additional rim protection in the event of a hard impact. Then along comes a Peter Faliszewski. Full disclosure, Peter is a friend of mine but this review will attempt to remain as unbiased as possible. As long as I’ve known Peter he has been a tinkerer. He’s not an engineer but has an ingrained curiosity about how things work, backed up with some DIY’er skills to dabble in fun projects. A few years ago, Peter showed up to ride to Whistler Bike Park wearing what I thought was a Leatt neck brace. Upon closer inspection, it was a one piece design made in full carbon. When asked, he exclaimed that he had played around with a few prototypes then laid up a couple of full carbon braces for himself and his kid. Lighter weight and improved ergonomics than other available products. He decided not to pursue that project further based both upon time to manufacture by hand and potential liability with bicycle safety device. About two years ago Peter shared with me another project, which he called RideSaver. This was an idea of his dating back to about 2008 when the move to tubeless setups was taking hold. At that time, he had dented a rear rim on a poorly executed curb hop. But tired of being left on the sidelines, or with a long walk home from his local bike park, he also wanted some additional protection against flats. His ideation predated all of the known products on the market today, but was left at the tinkering stage due to...well a full time job, a family, not working in the bike industry, you know. Now you have to know Peter, who’s tastes lean to ultra-light carbon but also frugality, that he was seeking a lighter and cheaper system that what was on the market. At that time we chatted, ProCore had been released and CushCore announced but HuckNorris was still on drawing board. Peter’s research led him to a commercially available closed-cell foam product available in 1.5” diameter. He then experimented with various prototypes until landing on diameter to provide the right tightness on rim, the best adhesive to hold the two rod end together, and modification of commercially available tubeless valves to allow air entry and exit under the insert. And voila, he dubbed the new system RideSaver.
Installation
Claims for RideSaver are more modest than other available systems. They add <100 grams per wheel and may provide you enough rim protection to ride out a flat to the finish line or end of your ride. Based upon a highly scientific squeeze test by this reviewer, RideSaver is noticeably less dense that the CushCore system. Therefore the square edge hit rim protection may be less with RideSaver. So let’s put it to the test. Installation of the RideSaver was pretty straightforward. I modified my existed valves by cutting a cross into the air outlet with a Dremel cutting wheel. Finding my Dremel took longer than making this modification. After replacing the valve, I began to fit the RideSaver over the rim of my 29” Mavic CrossMax SLR wheelset. The fit is tight. And along with existing tire sealant made the fitment process a bit like a greased pig contest. Definitely easy if you have an extra pair of hands but doable by yourself. Reseating the bead with the RideSaver installed is also a bit more. After some trial and error, I found it was possible to lift and roll the RideSaver a bit to allow the bead into the center channel of the rim and thus final bead seating easier. The CrossMax wheels are very easy to set up tubeless, with tire beads seating and sealing immediately with a compressor. The addition of RideSavers made this no harder.
Ride Test
The RideSavers were installed on the CrossMax wheels, along with Schwalbe Racing Ralph Tubeless Easy XC tires, on a Santa Cruz Tallboy 2. The real test would be the SingleTrack 6 multi-day race. With stages in Golden, Revelstoke and Vernon, including two days in bike parks, there would be plenty of opportunity to test the RideSavers in real world British Columbia XC racing conditions! Firstly, there was no noticeable difference in ride with the RideSaver installed. The bike didn’t feel appreciably different but perhaps I was also testing the system by running a little lower than usual air pressure ~22 psi. Were they ‘tuneable’ as some other systems suggest? I’d like to say yes, but again I didn’t feel the ride quality was significantly altered. Beyond this, I raced 6 days in pretty harsh XC conditions with no flats. No hard rim hits. No wheel truing. So they did their job? Yes. Well maybe. In a subjective test like this there is no way to know if you would have flatted or bent a wheel. And I didn’t get to test the premise of finishing a race with a flat riding only on the RideSaver. Each day of the race there was a timed downhill race within the XC race. These stages were more enduro stage length and I did my best to hang in the top 20 overall each day (which I felt was respectable riding a full XC bike in the company of pro riders and elite amateurs on larger trail bikes). I rode these downhill stages with some additional care than I would have on a larger bike but was still full gas on some pretty gnarly black and double black trails, with roots, rocks, jumps, drops and the like. I pulled the RideSavers out when I got home and was surprised to see how beat up they looked. The foam had gouges, bite marks, dents, etc around both front and rear inserts (but more noticeably the rear wheel). Thus my conclusion – they absolutely did their job!
Further testing
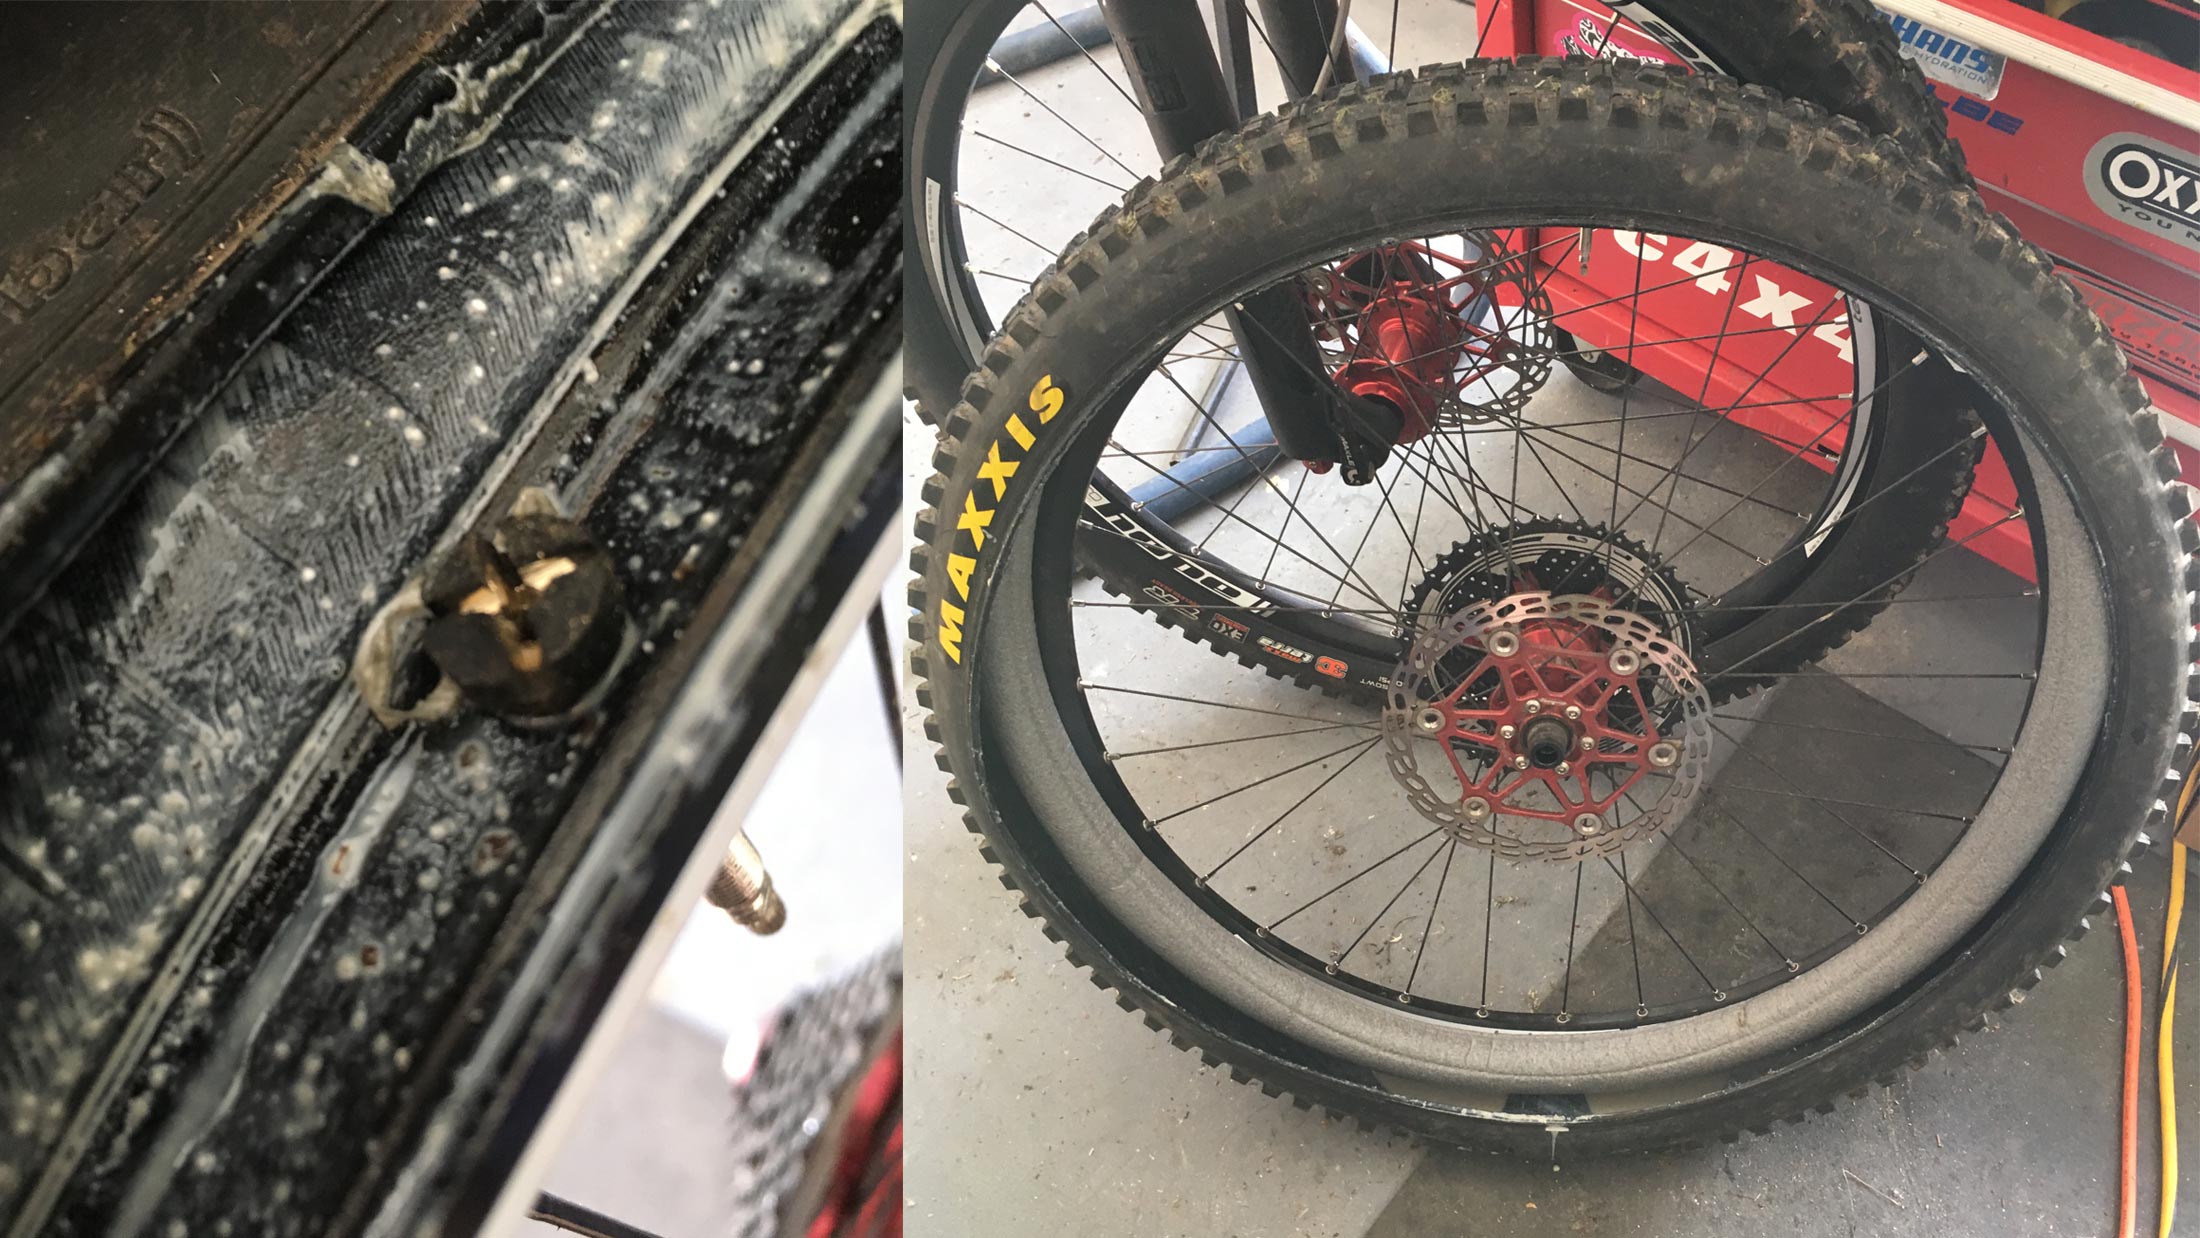
I’ve now installed a set of 27.5” RideSavers into my Chromag Wideangle. I’m running Hope Enduro rims, which are older in design with a narrow 23mm internal width, along with Maxxis DHF 2.5 and DHR 2.4 in WideTrail TR Exo versions. The real intent of this testing is to reduce read tire air pressure to provide a more compliant ride, while still minimizing hard rim hits. This bike sees ‘Whistler XC’ riding which includes some pretty rocky trails which provide ample opportunity to eat rims. In speaking with Sean at Chromag, many of their riders are experimenting with
DoubleDown casings to provide additional protection at low air pressures. I’ve found this RideSaver, rim and tire combination has allowed me to run ~22psi. Lowering to 20 psi and I’ve felt and heard some hard rim strikes on square edges. I’m also now running a RideSaver on a Norco Range with DT Spline One wheelset and Maxixis DHR with DH casing. And the 29” set is now in a Norco Sight with RaceFace ARC30 wheelset and Schwalbe Magic Mary Snakeskin and Maxxis DHR EXO. Peter has also supplied me with a 2” version that he is personally testing in a 2.6” tire on a DH bike. I’m not sure I have any bike setup that would allow these to be squeezed in. the additional volume is significant.
Final thoughts
There has been a rapid progression of innovation with rim inserts from multiple manufacturers in the past couple of years. In this reviewers opinion, there is not yet a magic bullet. I believe there is a significant opportunity to design and engineer a full system, including rim, tire and insert, that all work together. Such a system could be significantly more tunable, with additional damping properties, and make good on many of the other claims by current insert systems. In the meantime, if you’re keen to try RideSavers, tough luck! They are not commercially available. However, you can email Peter at